My daughter’s FFL Lego Club is over for the year, but I wanted to two helpful debugging things I learned along the way, that were especially helpful for newer kids.
This was the first year for a group of 5th and 6th graders and I noticed many of them ended up with some long procedural blocks of code to navigate the robot through obstacles across the board and back to the base. A really common problem was they’d make some progress, and then come back to the table only to discover the robot didn’t do what they expected after a “small change.”
The first fix for this was actually saving a copy off before making significant changes, just giving it a new name. The Lego LabVIEW environment didn’t make this easy as you have to cut and paste the blocks by hand into a new program, but it saves a lot of time with the kid’s longer programs. I’ve used Git for the same effect, but source control isn’t the focus here.
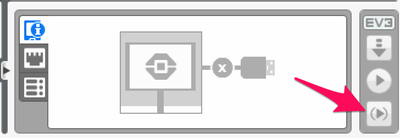
A second quick win was testing with the robot connected. Our boys and girls were very set on the program, download, run to the table loop, but I eventually had a few of them persuaded to test with the robot just connected via USB. The best part of this is you can select a single block and then run just that block with the robot. We used this several times to troubleshoot issues with arms that swung back too far and got stuck on lego pieces, which halts further execution and doesn’t give much feedback on what’s wrong.

Finally was the one I had the most fun with. Many kids’ programs had dozens of blocks connected. Often they would forget where they added tweaks to turn left, spin, or adjust the shooting arm. As a lover of sound effects I suggested adding sound effects before and after they added their tweaks so they’d know several things:
- Did my changes actually get loaded on the robot?
- Did my changes improved the program?
- Exactly where to tweak the program again if it just needed another adjustment.
The sounds were fun on their own and they can easily be deleted when the program is ready to go.